By General Crafts Contributor Ashley from the Blog Ash and Crafts.

Hello everyone! Today I am going to show you how to make fluffy tissue paper flowers! This is very easy to do and even kids can join in on the fun!

SUPPLIES:
- Tissue paper
- Chenille stems or wire
- Scissors

First you need to decide how fluffy you want your flower. If you want your flower to have a lot of petal layers, use more tissue paper. For this very fluffy flower, I used one entire package of tissue paper, which had 6 sheets. Cut the tissue paper until the width of the tissue paper is how wide you want your flower to be. Now do the same for your center tissue paper, but make the width as large as you want the center to be.

Begin to accordion fold your tissue paper. I made my folds approximately 1”.

Keep folding the paper up and down.

Fold until the entire length has been folded into an accordion. If there is any excess, trim it off. Do the same accordion fold for your center tissue paper.

Now you want to give your tissue paper an edge. For the center tissue, I chose to cut spiky triangles. For my petals, I made the edges rounded.

Now place your center in the approximate center of your petal tissue paper.

Collapse the according folds and secure with the chenille stem.

Spread the according folds open a bit. The chenille stem marks the very center of your flower.

Slowly peel the layers of the center tissue paper apart and pull towards the center.

Continue doing this for all the layers on both sides of the center. If your center is not as around as you’d like, you can trim the edges. Once you have pulled up all the layers, the chenille stem should be hidden.

Do the same with the petal tissue paper. The picture above shows one layer of the petal tissue paper pulled up.

Continue with all the layers

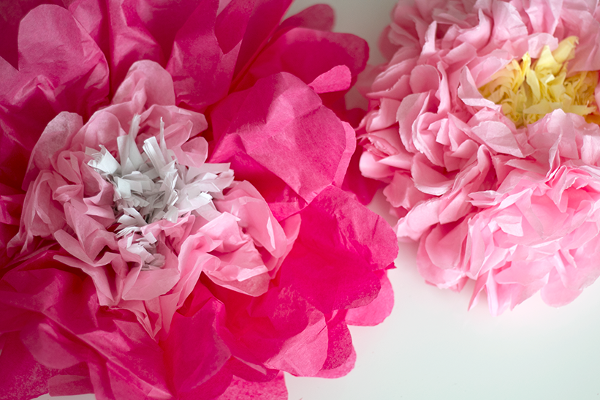
This is the final result! You can make many different variations of this flower using the same technique, but vary how much tissue paper you use, the color, and the shape of the edges.

In this example, I used less tissue paper and three different colors. I gave both the hot pink and the light pink a rounded edge, but I fringed the edge of the white tissue paper.

You can see how this flower is less dense than the previous flower.
I hope you’ve enjoyed this tutorial today! I’d love to see all the varieties you create with this technique!
![]()